How to Install an Automotive Lift
How to Install an Automotive Lift
No more jacks: If you're really serious about auto maintenance, put in your own lift. It's easier than ever to install one yourself—we'll show you how.
Auto lifts make every project easier—no more jacks and jackstands, bending over, or squeezing under a car for service. So why doesn't everyone have one? What used to be expensive, impossible to fit in most garages, hard to install, and dangerous to work with is now within reach of the advanced do-it-yourselfer. Global competition has driven down the cost of a very serious, good-quality, entry-level lift to under $1500—totally affordable. Innovative manufacturers have also developed a variety of lifts to match every garage and skill level. We're going to show you how to stop crawling around under the car and start working on your feet.
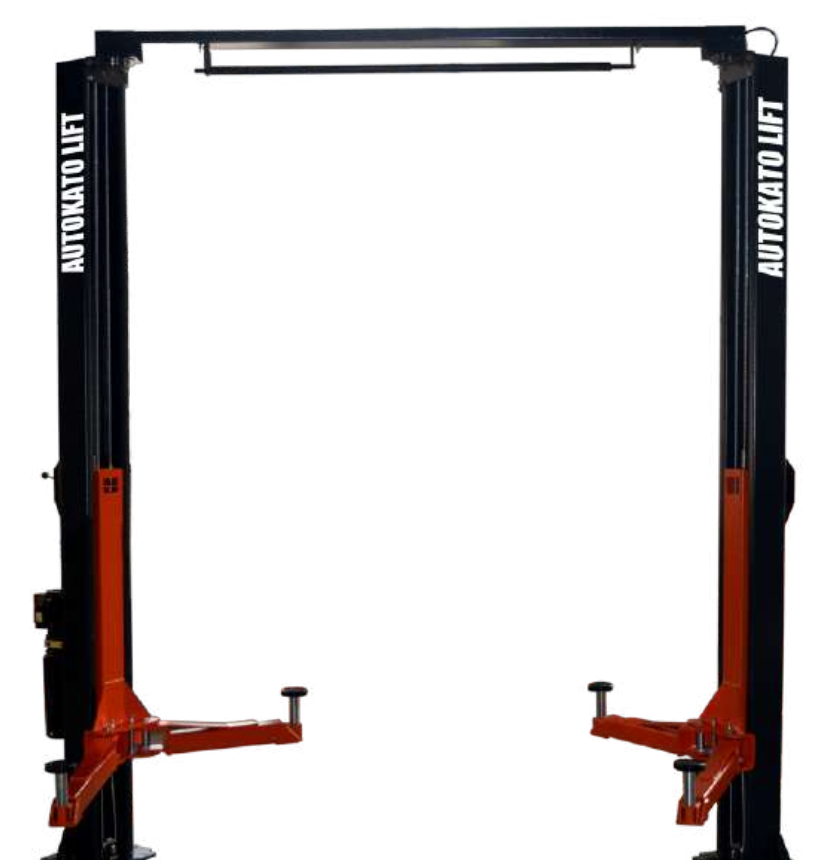
There are several types of lifts to choose from. For the new POPULAR MECHANICS garage in Ferndale, Mich., we installed a 9000-pound two-post 12-inch symmetrical lift with a 220-volt hydraulic pump (we never know what vehicles are going to roll in). A two-poster is one of the most versatile kinds of lifts and the one most people choose.
The first order of business is receiving and unboxing. Lifts aren't exactly feather-light, and they are shipped in big wooden crates—so make sure the shipper sends a truck-mounted crane or forklift to do the unloading. Also, have four furniture dollies (trust me, it'll be worth it) to drop it onto and roll the crate into the garage. Then tear open the box and sit down to read the instructions. No, really, actually read them.
The individual installation steps aren't hard (well, most of them), but pay careful attention to detail. We are talking about a potentially dangerous machine, so take your time.
tage 1: Assemble the Metal Frame
Balancing cables, safety locks, and hydraulic systems can all be hooked up while the lift is still on the ground. The cables serve to keep each lifting carriage at equal levels so the car doesn't rise unevenly. These are mounted with a bolt end, nut, and lock nut and should be run through the pulley system as directed. Tension the cables lightly to keep them in place.
With the lift mostly assembled and ready to go up, mark the floor for placement. Use a plumb bob, a measuring tape, a chalk line, and a permanent marker to draw out the end positions of the columns. Remember to account for the car approaching the lift, so keep turns or corners in mind when orienting the layout.
Finishing includes hiring a qualified electrician to install power to the pump and a plug at the column so that 220-volt power is nearby for a welder. Have a friend help by positioning the base of the lift arm with the holes in the lifting carriage while you drop the huge pins through the holes; jiggle the arm until the pin seats. Install the retaining clips and the mounting pads. Your lift is now physically complete.
Researching and selecting the right lift is the challenging first step of the process. Balancing multiple priorities and technical restrictions while keeping an eye on the budget is tricky. What will you be doing with a lift? Do you need full access to the underside of the car or just enough to do brake jobs and tire rotations? Doing restorations or just regular maintenance? Would an extra parking spot in your garage be nice? How big are the cars you'll work on?


